Options
The 2016 Setup was the first setup to be released on the MoonBoard app. Features: Original School Holds, School Holds - Set A, School Holds - Set B Download the app.
The 2017 Setup was the first setup to be released in both 40 and 25 degrees and filled the complete grid. Features: Original School Holds, School Holds - Set A, School Holds - Set B, School Holds - Set C, Wood Holds - Set A and Screw-on Footholds Download the app.
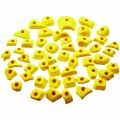
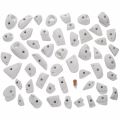
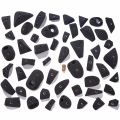
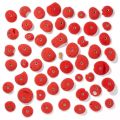
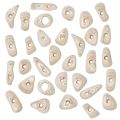
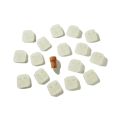
The 2019 Setup can be built at an angle of either 25° or 40°, according to your preferred difficulty. Features: Original School Holds, School Holds - Set A, School Holds - Set B, Wood Holds - Set A, Wood Holds Set B, Wood Holds Set C and Screw-on Footholds Download the app.


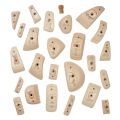
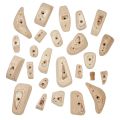

The Mini Moonboard Setup was designed for those without the space for a full size Moonboard. Features: Original School Holds, Wood Holds - Set A, Wood Holds Set B and Wood Holds Set C Download the app.


The 2024 setup features 198 holds, to form a completely new, densely-packed matrix. The organic and curvy pockets, pinches and edges will challenge your footwork and create more varied and all-round movement, to seriously improve your climbing, both physically and technically. Features: School Holds Set D, School Holds Set E, School Holds Set F, Wood Holds - Set A, Wood Holds Set B, Wood Holds Set C and Moonboard Footholds Download the app.
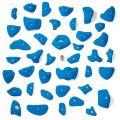
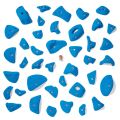
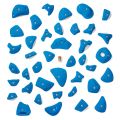


The Freestanding MoonBoard is a self-assembly, laser cut, powder coated steel framed MoonBoard. It requires two people half-a-day to assemble. During assembly it can be set at either the standard 40-degree angle or at a lesser 25-degree angle. Choose your setup 2016, 2017 , 2019 or 2024 and/or add a pad system. Download the app.
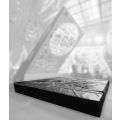
The Mini MoonBoard 2025 follows the exact same build and layout specifications as the standard MoonBoard, minus the top 6 rows, and a revised, shorter 15cm kick board configuration. This Mini MoonBoard 2025 DIY Kit includes the panels and kick board to ease your build process. Each panel is pre-drilled, t-nutted, and finished with a laser-engraved design. Features: Original School Holds (includes footholds for kick board) School Holds - Set F Wood Holds - Set B Wood Holds - Set C Download the app.


Is the MoonBoard suitable for you?
Grades range from 5+/V2 to 8b+/V14 depending on which set up you choose. Download the app, select the various different setups and have a look at the range of problems and grades to see if the Moonboard is right for you.
How much space do you need?
We offer the MoonBoard in two sizes, the Mini MoonBoard and the Standard MoonBoard. The Standard MoonBoard with the frame (see Freestanding MoonBoard below) requires the most space. Please note that if you include the MoonBoard Pad System with your Freestanding MoonBoard, the width requirement increases to 5455mm.
Metric
| Freestanding MoonBoard | Standard DIY MoonBoard | Mini DIY MoonBoard | |||
|---|---|---|---|---|---|
| 40° | 25° | 40° | 25° | 40° | |
| Height (mm) | 3554 | 4100 | 3174 | 3688 | 2020 |
| Width (mm) | 2440 | 2440 | 2440 | 2440 | 2440 |
| Depth (mm) | 4860 | 4860 | 2353 | 1547 | 1569 |
Imperial
| Freestanding MoonBoard | Standard DIY MoonBoard | Mini DIY MoonBoard | |||
|---|---|---|---|---|---|
| 40° | 25° | 40° | 25° | 40° | |
| Height (inch) | 11’7” | 158” | 10'42" | 12’1” | 6'62" |
| Width (inch) | 8' | 8' | 8' | 8' | 8' |
| Depth (inch) | 15’9” | 15’9” | 7’8” | 5’1” | 5’1” |
Which hold setup should you choose?
The setup that you choose is a matter of personal choice. Download the MoonBoard App and have a look at the different setups and the problems each one has, to get an idea of which setup works best for you.
Each hold is designated to a specific coordinate and rotation on the MoonBoard according to your chosen hold setup. Each MoonBoard hold set offers a different selection of hold shapes and climbing difficulty. Some hold sets feature in all MoonBoard setups, while the more recent hold releases only feature in new setups. For advice on which hold set you should choose for your MoonBoard, join the official MoonBoard Climber's Network group on Facebook. It's the perfect way to connect to other users around the world and find the answers to your questions. Download the app.
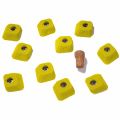
Two sets of different footholds are available for use on the MoonBoard: the required yellow bolt-on footholds which are to be set on the kickboard; and the optional translucent screw-on footholds for use on the main panels. There are four different foothold rules in the MoonBoard app: Feet follow hands Feet follow hands + Screw-Ons* Footless (Kickboard footholds are allowed to start)* Screw-Ons only* When setting a problem you may select the foothold rule that is appropriate to your climb. This rule will then be visible to other users when viewing the problem. * These rules are not available on the 2016 setup. Download the app.
See below for the handholds and footholds available.
Options
Moonboard handholds are grouped into what we call holdsets. The holds are made from either polyester, polyurethane or plywood and come in a variety of shapes. There are 10 different holdsets available and they are used in various combinations depending on which setup is chosen. Please note that holdsets do not include fixings, these must be purchased separately. Download the app.


There are 2 sets of Moonboard footholds available. The Moonboard Footholds also come as part of the yellow Original School Holds holdset, while the Screw on Footholds must be purchased separately or as part of a kit (DIY or Freestanding Moonboard). Please note that footholds or holdsets do not include fixings, these must be purchased separately. Download the app.


Which angle should you choose?
The 2020 Mini MoonBoard hold setup is offered in one angle only, 40°. The other setups are offered in two angles: 25° and 40°. Opting for the steeper 40° angle demands greater strength and power and a dynamic approach to climbing compared to the 25° angle. The 25° angle increases the emphasis on footwork, making it generally more accessible for training purposes.
Which MoonBoard build option should you choose?
There are two ways to get your MoonBoard:
Option 1
The easiest method is to purchase one of our official build kits, which include all the MoonBoard holds, the LED System, and ready-to-install panels. There are two choices of build kits:
Choose from:
Freestanding MoonBoard Kit (not available in the Mini MoonBoard) This option includes everything you need, including the frame, all the setups, and is also available to purchase with our compatible MoonBoard Pad System, or
MoonBoard DIY Kit Choose the setup you want for your MoonBoard and buy the corresponding DIY Kit, for example the MoonBoard 2016 DIY Kit or the MoonBoard 2017 DIY Kit. (Note that this method will require you to build your own frame. You will find the frame specifications under Building Your MoonBoard.)
All MoonBoard DIY Kits come with clear instructions for easy assembly. You will find the frame specifications under Building Your MoonBoard.
Option 2
Alternatively, you can buy all the individual MoonBoard components (holds, LED System, bolts and t-nuts), without the panels. Choose the setup you want for your MoonBoard, for example the 2016 or 2017 setup, and buy the hold sets for that setup. (Note that this method will require you to build your own frame and panels. You will find the frame and panel specifications under Building Your MoonBoard.)
Can you have more than one MoonBoard?
Having multiple MoonBoards in the same location is possible. However, if you decide to install multiple LED MoonBoards in the same location, it's important to note that unless you opt for a V3 LED MoonBoard System, you'll need to get in touch with Moon Climbing to ensure compatibility between each LED system.

